


DIY = DO IT YOURSHELLF
TIME TO TAKE A SHELLFIE
We don’t know about you, but we’re currently lusting after animal-print nail art. It’s everywhere – from cow-print on Kendal Jenner and Ariana Grande’s digits to our fave look of the moment – Tortoiseshell. Follow our tutorial below to recreate the animal-inspired nail look. We promise this step-by-step guide has been road-tested on real humans and swear it can be done in a fuss-free way with no technical tools! Better get started…
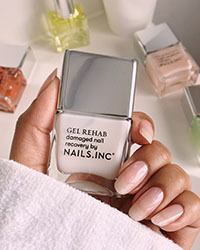
You will need: our Coco For Real Chocolate Scented Nail Polish Duo, Black Taxi Nail Polish, NailKale Base Coat, SOS Pen and Lacquer Lock Top Coat.
- Paint your NailKale Superfood Base Coat using the lid as a secure finger rest. This base coat is a powerful and deeply nourishing treatment packed full of vitamins A, C, E, F and H. Formulated with keratin to harden and activate the stimulation of nail growth. NailKale also acts as an anti-breakage and anti-splitting shield. Dermatologically tested to brighten and smooth nails with extracts of aloe vera, lemon, ginseng, pomegranate and grape. Let your nails drink up the goodness under your polish or style it out alone for glossy naked nails.
- While you try to resist taking a bite out of these nail polishes (that chocolate scent is all too tempting, we know), apply one coat of I’m Fondue You, a sheeny caramel foil shade from the Coco For Real Chocolate Duo to each nail – always seal the free edge.
- Yep, you guessed it, more chocolate. Take 100% Hot Chocolate, an indulgent dark brown. Wipe off any excess polish so it is fairly dry and start at the cuticle edge with small brushstrokes down the nail. Keep it to the top third section of the nail.
- Turning your nail on the side, start at the sidewall and paint across the nail, creating patches of creamy cocoa-rich brown. Place the third brown section on the free edge working the polish up and along the nail to fill the space.
- Take Black Taxi Nail Polish (the darkest shade of our bestselling Gel Effect nail polishes, obvs) and place a dot in the centre of each brown section. Wipe the excess polish off the brush and lightly pull the black polish into the brown section. Use the side of the brush for extra control over the brushstrokes (watch the video below for a visual explanation).
- You may want to add some extra detailing. Follow the previous step by adding some black polish dots and blending out. Pro nail artists, eat your heart out.
- Now for the fiddly yet super satisfying step. Grab your SOS Pen and touch up any paint smudges ready for the next bit.
- To seal and protect your polish colour apply Lacquer Lock Top Coat. A revolutionary top coat that features sunlight curing technology, using natural UV rays to lock in your colour for extended wear for up to 14 days. The result - brilliant shine and glossy nails. Wear over any polish to create a longwear result that is resistant to breakage and chipping.


Our nail polish range is #crueltyfree and #vegan, designed to keep your nails 100% happy and healthy, because you know, nails get bored too.
Share the love and tag us IRL over on Instagram @nailsinc - we are also here to answer any questions you may have and let us know what nail tutorials you would like to see!
#beyourincredibleself #crueltyfree #vegan #stayathomeselfcare #manicure #nailart #animalprint #tortoiseshell #athomemanicure
Read More Articles

This Is Halloween
Spooky season is approaching… AKA Halloween! We’ve put together a bumper guide of 10 fa-boo-lous nail art looks to serve in the run up to October 31st…
Read More >
Ombré Nail Art
Fruity, and oh-so fresh. Nope, we’re not talking about your breakfast this morning, but the latest nail trend you’ll want to try. This way, ombré…
Read More >
Feeling Fire
Get them while they’re HOT! Our new INC.redible plumping lip gloss range, that is. Things are about to get nice n spicy.
Read More >